


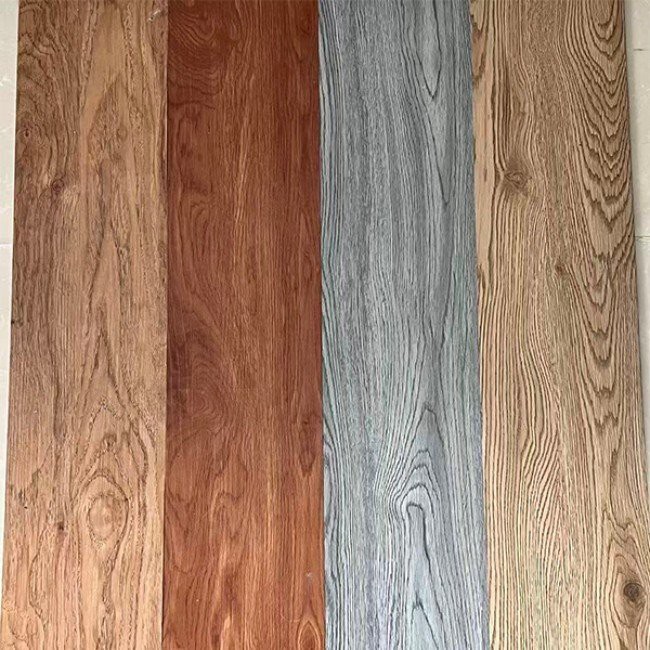
As a trusted supplier of gray PVC planks, I'm often asked about the best installation methods. Gray PVC planks are a popular choice for wall decoration due to their durability, versatility, and aesthetic appeal. In this post, I'll walk you through the step-by-step process of installing gray PVC planks on a wall, ensuring a professional and long-lasting finish.
Preparation
Before you begin the installation process, it's crucial to prepare the wall and gather all the necessary materials and tools. Here's what you'll need:
Materials
- Gray PVC planks
- Measuring tape
- Utility knife
- Level
- Pencil
- Adhesive
- Spacers
- Trim pieces
Tools
- Drill
- Screwdriver
- Circular saw
- Miter saw
- Hammer
Wall Preparation
- Clean the Wall: Remove any dust, dirt, or debris from the wall surface. Use a damp cloth to wipe down the wall and ensure it is dry before proceeding.
- Repair Damages: Check the wall for any cracks, holes, or uneven areas. Fill them with spackle or joint compound and sand the surface smooth once the filler is dry.
- Measure the Wall: Use a measuring tape to determine the dimensions of the wall where you'll be installing the PVC planks. This will help you calculate the number of planks you need and plan the layout.
- Mark the Studs: Locate the wall studs using a stud finder and mark their positions with a pencil. This will be important for attaching the PVC planks securely to the wall.
Installation Process
Once you've completed the preparation steps, you're ready to start installing the gray PVC planks on the wall. Follow these steps for a successful installation:
Step 1: Start at the Bottom
Begin by installing the first row of PVC planks at the bottom of the wall. Apply a thin layer of adhesive to the back of the plank using a notched trowel. Press the plank firmly against the wall, aligning it with the marked stud positions. Use a level to ensure the plank is straight and adjust as needed.
Step 2: Secure the Planks
Once the first plank is in place, use a drill or a screwdriver to attach it to the wall studs. Place screws or nails at regular intervals along the edges and center of the plank. Make sure to countersink the screws or nails slightly to prevent them from protruding.
Step 3: Continue the Installation
Repeat the process for the remaining planks in the first row, working your way from left to right. Use spacers to maintain a consistent gap between the planks for expansion and contraction. Cut the last plank in the row to fit the remaining space using a utility knife or a circular saw.
Step 4: Install the Second Row
When installing the second row, stagger the joints to create a more visually appealing pattern. Start the second row with a half plank or a cut piece to ensure the joints are offset from the first row. Apply adhesive to the back of the plank and press it firmly against the wall, aligning it with the first row. Secure the plank with screws or nails as before.
Step 5: Repeat the Process
Continue installing the remaining rows of PVC planks, following the same pattern as the second row. Use a level to ensure each row is straight and adjust as needed. Cut the planks as necessary to fit around windows, doors, or other obstacles.
Step 6: Install Trim Pieces
Once all the PVC planks are installed, it's time to add the finishing touches. Install trim pieces around the edges of the wall, such as baseboards, crown molding, or corner guards. Use a miter saw to cut the trim pieces at the appropriate angles for a professional look. Secure the trim pieces to the wall using nails or adhesive.
Tips and Tricks
Here are some additional tips and tricks to ensure a successful installation of gray PVC planks on a wall:

- Plan the Layout: Before you start installing the planks, plan the layout carefully to ensure a balanced and visually appealing pattern. Consider factors such as the size and shape of the wall, the direction of the planks, and the location of any obstacles.
- Use the Right Adhesive: Choose an adhesive that is specifically designed for PVC planks and suitable for the type of wall surface you're working with. Follow the manufacturer's instructions for applying the adhesive and allow it to dry completely before proceeding.
- Cut the Planks Accurately: Use a sharp utility knife or a circular saw to cut the PVC planks. Measure and mark the planks carefully before cutting to ensure a precise fit. When making angled cuts, use a miter saw for the best results.
- Handle the Planks with Care: PVC planks can be easily scratched or damaged, so handle them with care during installation. Avoid dragging the planks across the floor or wall surface, and use a soft cloth to wipe away any dust or debris.
- Allow for Expansion and Contraction: PVC planks expand and contract with changes in temperature and humidity, so it's important to leave a small gap between the planks and the wall, as well as around windows, doors, and other obstacles. Use spacers to maintain a consistent gap during installation.
Conclusion
Installing gray PVC planks on a wall is a relatively straightforward process that can be completed by DIY enthusiasts with basic tools and skills. By following the steps outlined in this post and using the right materials and techniques, you can achieve a professional-looking finish that will enhance the beauty and functionality of your space.
If you're interested in purchasing high-quality gray PVC planks for your next project, we're here to help. We offer a wide range of gray PVC planks in various styles, sizes, and finishes to suit your needs and preferences. Our products are made from durable and eco-friendly materials, and we provide excellent customer service and support.
For more information about our gray PVC planks and other flooring options, such as Herringbone Luxury Vinyl Flooring, Waterproof Vinyl Tile Flooring, and Self Adhesive PVC Flooring, please contact us to discuss your requirements and get a quote. We look forward to working with you!
References
- "PVC Wall Panel Installation Guide." Flooring Inc.
- "How to Install PVC Wall Panels." Home Depot.
- "Installing PVC Planks on a Wall." DIY Network.


