


As a supplier of LVT Click Flooring Herringbone, I'm often asked about the installation process of this stylish and practical flooring option. In this blog, I'll walk you through the step - by - step installation process of LVT Click Flooring Herringbone, sharing insights from my experience in the industry.
1. Preparation
Before you start installing LVT Click Flooring Herringbone, proper preparation is crucial.
Subfloor Inspection
The first step is to thoroughly inspect the subfloor. It should be clean, dry, and level. Any debris, dust, or moisture can affect the installation and the long - term performance of the flooring. For a concrete subfloor, check for cracks and unevenness. You can use a self - leveling compound to correct minor irregularities. If the subfloor is wood, make sure it is firmly attached and free of squeaks.
Measuring the Room
Accurately measure the length and width of the room. This will help you determine how much LVT Click Flooring Herringbone you need. It's advisable to add an extra 5 - 10% to your measurement to account for cuts and waste. You can use a tape measure and graph paper to create a scale drawing of the room, which will also assist in planning the layout.
Acclimation
LVT Click Flooring Herringbone needs to acclimate to the room's environment before installation. Unpack the flooring and let it sit in the room where it will be installed for at least 48 - 72 hours. This allows the planks to adjust to the temperature and humidity, reducing the risk of expansion or contraction after installation.
2. Layout Planning
The herringbone pattern of LVT Click Flooring adds a touch of elegance to any space, but it requires careful layout planning.
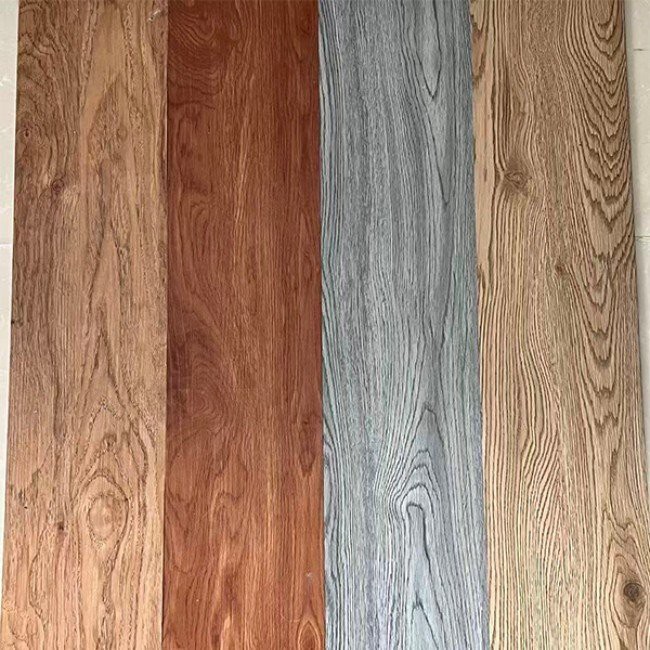

Starting Point
Choose a starting point for your installation. A common approach is to start in a corner of the room. You can use a chalk line to mark a straight reference line along the wall. This line will ensure that your herringbone pattern is straight and aligned correctly.
Pattern Design
The herringbone pattern consists of V - shaped rows of planks. To create the pattern, you'll need to cut the planks at a 45 - degree angle. You can use a miter saw or a utility knife for cutting. Start by laying a few rows of planks in the herringbone pattern to visualize how it will look in the room. Make sure to alternate the direction of the planks to achieve the classic herringbone look.
3. Installation
Once you've completed the preparation and layout planning, it's time to start installing the LVT Click Flooring Herringbone.
First Row
Begin by laying the first row of planks along the reference line. The click - together system of LVT Click Flooring makes installation relatively easy. Align the tongue of one plank with the groove of the next plank and gently press them together until you hear a click. Make sure the planks are tightly connected to prevent gaps.
Cutting Planks
As you reach the end of a row, you'll likely need to cut the planks to fit. Measure the remaining space and mark the plank accordingly. Use a miter saw or a utility knife to make the cut. For a clean cut, score the plank with the utility knife and then snap it along the scored line.
Continuing the Pattern
Continue laying the planks in the herringbone pattern row by row. As you progress, make sure to stagger the joints between rows to enhance the stability and appearance of the flooring. The herringbone pattern may require more precise alignment compared to other patterns, so take your time to ensure each plank is in the correct position.
Around Obstacles
When you encounter obstacles such as doorways, columns, or pipes, you'll need to make custom cuts. Measure the shape and size of the obstacle and transfer the measurements to the plank. Use a jigsaw or a coping saw to make the necessary cuts. Take care to make accurate cuts to ensure a seamless fit around the obstacles.
4. Finishing Touches
After the main installation is complete, there are a few finishing touches to add.
Trimming the Edges
Trim the edges of the flooring where it meets the walls. You can use a trim piece, such as baseboard or quarter - round, to cover the gap between the flooring and the wall. This not only gives the installation a professional look but also protects the edges of the flooring.
Cleaning
Once the installation is finished, clean the floor thoroughly. Use a mild cleaning solution and a soft mop to remove any dust or debris. Avoid using abrasive cleaners or tools that could scratch the surface of the LVT Click Flooring Herringbone.
Benefits of LVT Click Flooring Herringbone
LVT Click Flooring Herringbone offers several benefits that make it a popular choice for both residential and commercial spaces.
Aesthetics
The herringbone pattern adds a timeless and elegant look to any room. It can enhance the visual appeal of a space and create a sense of luxury. Whether you're looking to update a small bathroom or a large living room, LVT Click Flooring Herringbone can transform the look of the area.
Durability
LVT Click Flooring Herringbone is highly durable. It can withstand heavy foot traffic, scratches, and stains. This makes it a great option for high - traffic areas such as hallways, kitchens, and commercial spaces.
Waterproof
As a Waterproof Vinyl Tile Flooring, LVT Click Flooring Herringbone is resistant to water damage. It can be installed in areas prone to moisture, such as bathrooms and basements, without the risk of warping or mold growth.
Easy Installation
The click - together system of LVT Click Flooring Herringbone makes installation relatively easy, even for DIYers. You don't need to use adhesives or nails, which saves time and effort.
Conclusion
Installing LVT Click Flooring Herringbone is a rewarding project that can enhance the beauty and functionality of your space. By following the steps outlined in this blog, you can achieve a professional - looking installation. If you're interested in purchasing LVT Click Flooring Herringbone or Herringbone Luxury Vinyl Flooring, feel free to reach out to us for more information and to discuss your procurement needs. We're here to help you find the perfect flooring solution for your project.
References
- "LVT Flooring Installation Guide", Flooring Industry Association.
- "Herringbone Pattern Design Principles", Interior Design Magazine.


